


Document Actions
gvSIG-Desktop 1.10. User Manual
In addition to static labelling and user defined advanced labelling, there is a third type of labelling, namely Single Labelling, which can be accessed via the following icon on the toolbar:

Single labelling icon
This type of labelling supplements the existing functionality of annotation layers. In fact, single labelling allows the user to create personalised annotations that have not been possible till now.
The result is an annotation layer, of type shape, plus a file with a .gva extension.
This type of labelling acts only on the geometry that the user has selected in the gvSIG View.
As with advanced labelling, valid label expressions can take on a number of forms:
- Strings
- Fields from the attribute table
- Mathematical expressions
- Combinations of the above
The advantage of Single Labelling over static or user defined labelling, aside from the availability of the many annotation layer labelling options, is that individual labels can be modified and/or moved after they have been created. This is because the labels are in a new, independent layer that can edited just like any other vector layer.
The steps for using this type of labelling are described below:
Configure the annotation properties:
From the main window of this tool, the user can set some basic properties that will apply to the new annotation labels (default annotation properties can be defined in the Annotation properties section of the gvSIG Preferences).
- Font type
- Font style
- Font height
- Font Colour
- Font Rotation
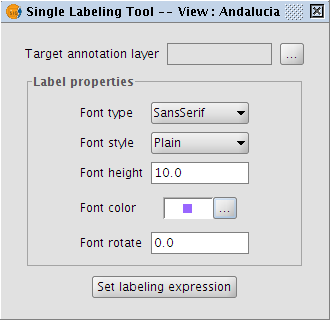
Properties of the annotation being created
Configure the target annotation layer:
As shown in the following dialog box, it is possible to open an existing annotation layer from the hard drive, create a new one in the specified location, or to select one that has already been loaded into the View:
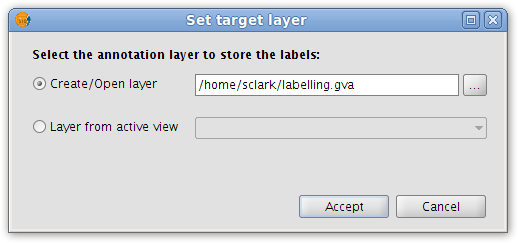
Destination of the annotation layer
Define a labelling expression:
Activate the source layer in the ToC, click the Set labelling expression button and then define an expression in the text box next to the layer name.
An example of this step is shown below:
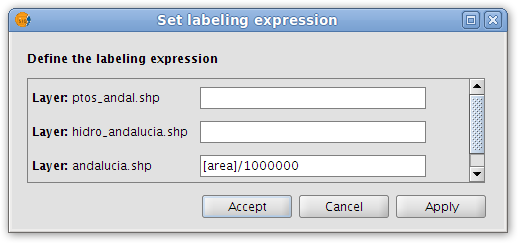
Annotation labelling expression
In the View click on the features that need to be labelled.
In this way, labels are inserted into the View as each of the features is clicked. The labels are drawn according to the label properties set above.
Finally, opening the Layer properties for the annotation layer reveals that a new 'Annotation' tab has been added to the dialog box.
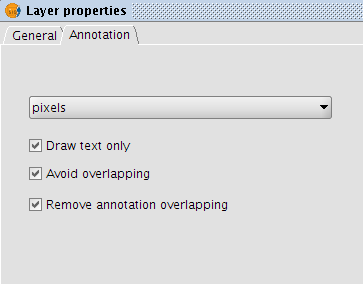
Annotation tab in the Layer properties dialog box
In this tab it is possible to configure a number of annotation options:
- Measurement units (any of the measurement units supported by gvSIG may be selected)
- Draw text only
- Avoid overlapping
- Remove overlapping annotation
Cached time 11/21/13 07:08:09 


